10 Pro Real Estate Photography Tips to Elevate Your Listings in 2026
In today's competitive real estate market, professional photography isn't just a luxury; it's the cornerstone of a successful listing. High-quality images do more than just showcase a property; they create an emotional connection, build buyer trust, and can significantly increase a home's perceived value and online engagement. However, capturing magazine-worthy shots involves more than just pointing and shooting. It requires a deep understanding of lighting, composition, staging, and the right technology to bring a space to life. The difference between an average photo and a compelling one often lies in the small, professional details that many overlook.
This guide provides 10 essential real estate photography tips designed for agents, photographers, and designers who want to master the craft. We will move beyond the basics, offering actionable insights that cover every stage of the process, from pre-shoot preparation and mastering your camera settings to advanced post-processing and the revolutionary impact of AI visualization tools like MoldaSpace. We'll explore practical techniques for composition, how to use light effectively, and why staging is non-negotiable for achieving a polished, marketable look. Whether you're shooting with a professional DSLR or leveraging your smartphone, these techniques will help you create powerful visual narratives that stop scrollers in their tracks and turn online views into in-person visits. Get ready to transform your listings and set a new standard for property marketing.
1. Master Lighting for Maximum Visual Impact
Lighting isn't just about brightness; it's about mood, depth, and emotional appeal. In real estate photography, mastering light is the single most effective way to transform a simple room into an inviting home. It involves strategically blending natural and artificial light sources to eliminate harsh shadows, highlight key architectural details, and create a warm, welcoming atmosphere that resonates with potential buyers. This is one of the most fundamental real estate photography tips because great lighting makes a property feel more spacious, clean, and desirable.
This principle is crucial for both traditional photography and modern marketing tools. For example, when providing images to an AI-powered virtual staging tool like MoldaSpace, photos with balanced, consistent lighting produce far more realistic and compelling results.
Why It Works
Proper lighting directly influences a buyer's perception. Soft, diffused light evokes a feeling of comfort and serenity, while bright, crisp light suggests cleanliness and energy. By controlling the light, you control the narrative of the space. Luxury real estate photographers often schedule shoots during the "golden hour" (the first hour after sunrise and the last hour before sunset) to capture properties in a warm, ethereal glow that screams premium quality. This technique makes exteriors look dramatic and interiors feel cozy.
Actionable Lighting Techniques
Follow these practical steps to elevate your images:
- Embrace the Golden Hour: Plan exterior and key interior shots for this time. The low-angle sun produces soft, directional light that adds dimension without creating hard shadows.
- Turn On All Lights: For interior shots, switch on every lamp and overhead fixture. This creates layers of light and adds a lived-in warmth, making the space feel more inviting.
- Balance with Off-Camera Flash: Use a flash bounced off a ceiling or wall to gently fill in shadows that natural light doesn't reach. This creates a balanced, professional look without appearing artificial. Avoid pointing the flash directly at your subject.
- Avoid Midday Sun: The high, direct sun between 11 a.m. and 3 p.m. is harsh. It creates deep, unflattering shadows and can wash out colors, making properties look stark and less appealing. If you must shoot during this time, focus on interiors where you have more control.
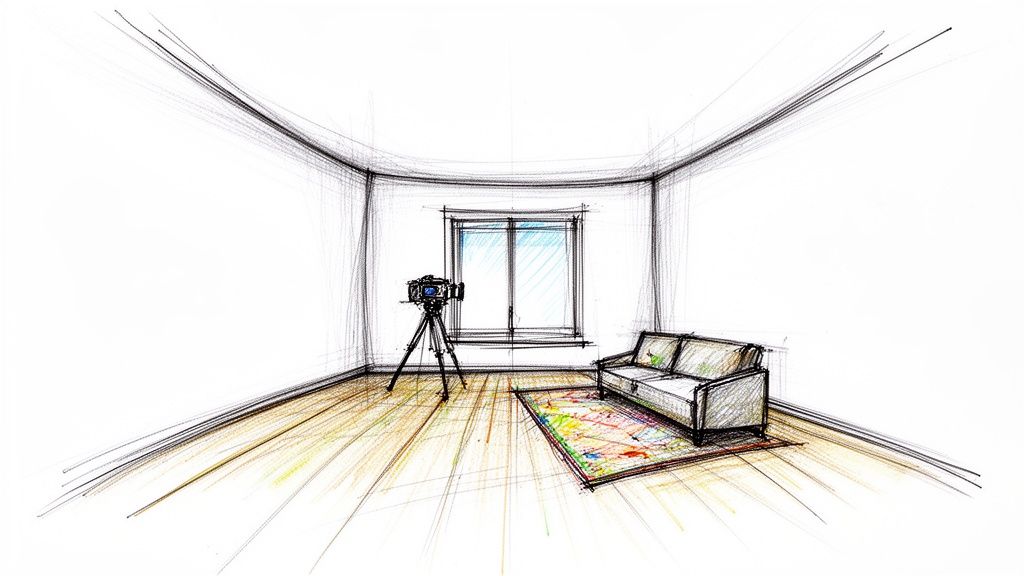
2. Use Wide-Angle Lenses to Maximize Space Perception
A wide-angle lens is non-negotiable in the world of property marketing. It captures a broader field of view than the human eye, making rooms feel larger, more open, and more inviting. Typically in the 16-35mm range for full-frame cameras, these lenses allow you to showcase an entire room in a single shot, providing crucial spatial context that standard lenses cannot. This technique is one of the most impactful real estate photography tips because it directly addresses a key buyer desire: a sense of spaciousness.
The goal isn't to deceive, but to translate the three-dimensional experience of a room into a compelling two-dimensional image. When you provide wide-angle photos to AI-driven design tools, for instance, you give the software a comprehensive view, leading to more accurate and appealing virtual staging or renovation concepts.
Why It Works
Buyers make snap judgments based on listing photos. A cramped-looking image can cause them to dismiss a property without a second thought. Wide-angle lenses create a grander, more aspirational perception of the space. By including more of the room's layout, furniture, and architectural features, you help potential buyers mentally place themselves in the home. It’s a standard practice seen in publications like Architectural Digest and across high-performing MLS listings because it effectively sells the feeling of a property, not just its physical dimensions.
Actionable Lens Techniques
Follow these practical steps to use wide-angle lenses effectively:
- Find the Sweet Spot: A focal length between 24-28mm often provides the best balance, creating a sense of space without excessive, unrealistic distortion. Going too wide (e.g., 16mm) can make furniture near the edges look stretched.
- Keep the Camera Level: To avoid converging vertical lines where walls appear to lean inward, always keep your camera perfectly level. A tripod with a built-in bubble level is essential for this.
- Position at Eye Level: Set your tripod height to approximately five feet (1.5 meters). This creates a natural, grounded perspective that feels authentic to the viewer, as if they are walking through the room themselves.
- Correct Distortion in Post-Processing: Use the lens correction feature in software like Adobe Lightroom or Photoshop. This tool automatically identifies your lens and straightens distorted lines, resulting in a professional, polished image.
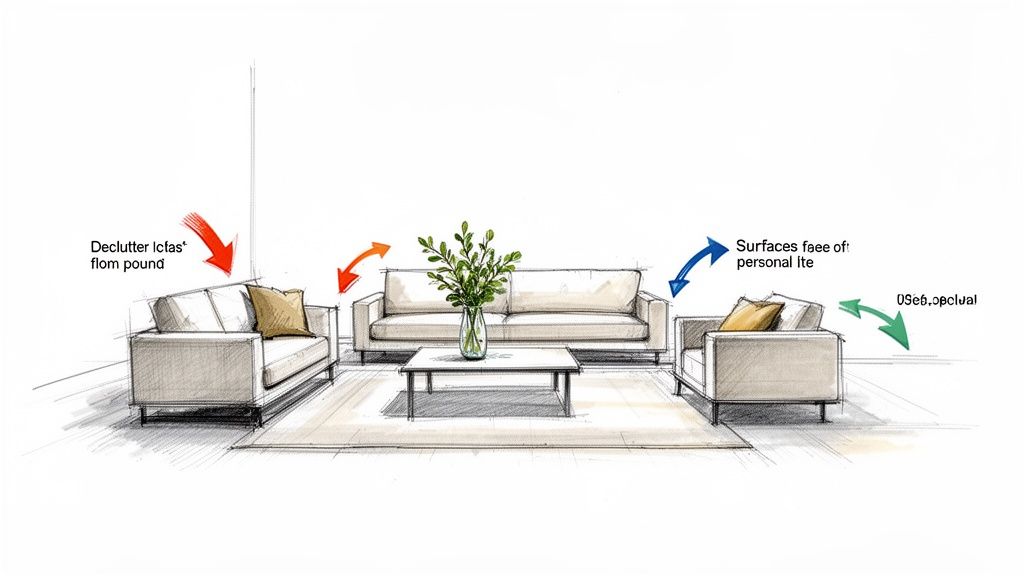
3. Stage and Declutter Properties Before Shooting
Proper staging is the foundation of compelling real estate photography, transforming a personal residence into a universally appealing product. It involves methodically removing personal items, decluttering surfaces, and arranging furniture to enhance the property's flow and features. This allows potential buyers to envision themselves living in the space, rather than feeling like guests in someone else's home. Effective staging is one of the most crucial real estate photography tips because it directly influences a property's perceived value and marketing success.
This process goes beyond simple tidying. It's a marketing strategy that helps photographers capture clean, impactful images. Modern tools have revolutionized this step; for instance, AI-powered platforms like MoldaSpace enable agents and stagers to visualize different furniture arrangements and styles virtually before any physical work begins. This allows for data-driven decisions on what will appeal most to the target demographic.
Why It Works
A decluttered and well-staged home appears larger, brighter, and better maintained. By removing personal photos, memorabilia, and excess furniture, you create a blank canvas that appeals to a broader audience. This depersonalization is key; it shifts the focus from the current owner's life to the property's potential. According to the National Association of REALTORS (NAR), 82% of buyers' agents said staging a home made it easier for a buyer to visualize the property as a future home. A clean, organized space communicates care and value, justifying a higher price point.
Actionable Staging Techniques
Implement these steps to prepare any property for a successful photoshoot:
- Depersonalize and Declutter: Aim to remove 30-50% of the items in a room. This includes family photos, collections, and any personal clutter on countertops, tables, and shelves.
- Arrange Furniture for Flow: Position furniture to create clear walking paths and highlight architectural features like fireplaces or large windows. Pull pieces away from the walls to make rooms feel more spacious.
- Add Strategic Accents: Introduce pops of color and life with fresh flowers, a bowl of fruit on the kitchen counter, or new, neutral-colored throw pillows on the sofa.
- Leverage Virtual Pre-Staging: Use an AI visualization tool to test different layouts and design styles like Minimalist, Scandinavian, or Japandi. By showing clients a virtual mockup first, professional home stagers can finalize a concept that aligns with the property's character before committing to physical arrangements.
4. Capture Multiple Angles and Perspectives Per Room
A single photograph can't tell the whole story of a room. Professional real estate photography is about building a comprehensive visual narrative, and that requires capturing spaces from multiple angles and perspectives. This approach involves more than just one wide shot; it means documenting the room's layout, flow, and unique features through a series of carefully planned images. This is one of the most vital real estate photography tips because it gives potential buyers a true sense of the space, helping them visualize themselves living there.
This method is also incredibly beneficial when working with AI visualization tools. Providing an AI-powered platform like MoldaSpace with multiple high-quality angles allows it to generate more accurate and diverse virtual staging options, as it has more data to understand the room's dimensions and potential.
Why It Works
Presenting a room from various viewpoints helps buyers overcome the limitations of 2D images. A corner shot can reveal the depth and size of a room, while a straight-on shot highlights its symmetry and key focal points like a fireplace or large window. Detail shots of high-end finishes or unique architectural elements add a touch of luxury and perceived value. This comprehensive coverage builds trust and allows a prospective buyer to mentally "walk through" the property before ever setting foot inside, creating a stronger emotional connection.
Actionable Perspective Techniques
Use these strategies to create a complete visual tour of any room:
- Shoot 4-6 Angles Per Room: As a minimum, capture the room from each corner, a straight-on hero shot, and a shot looking out into the next space to show flow.
- Vary Your Shot Types: Combine establishing wide-angle shots to show the entire space, medium shots to focus on a specific area like a seating arrangement, and detail close-ups of features like countertops, fixtures, or custom millwork.
- Document Transitions: Take photos from doorways and hallways looking into rooms. These "transitional" shots are crucial for helping viewers understand the property's layout and how different spaces connect.
- Highlight Architectural Features: If a room has vaulted ceilings, a unique window, or built-in shelving, dedicate a specific shot to it. Use vertical compositions to emphasize height and leading lines to draw attention to special characteristics.
5. Perfect White Balance and Color Accuracy
Color accuracy isn't a luxury; it's a necessity for creating trustworthy and appealing property images. Perfect white balance ensures that the colors in your photos are true to life, preventing a room with warm, neutral walls from appearing cold and blue or a sleek white kitchen from looking yellowed. Inconsistent color casts across a listing create a jarring experience for viewers and can misrepresent the property's actual finishes and feel. This is one of the most crucial real estate photography tips because accurate color builds buyer confidence and reduces post-processing headaches.
This level of precision is especially vital when using advanced marketing tools. For instance, when you upload images to an AI-powered platform like MoldaSpace for virtual staging, photos with correct white balance provide the system with a clean, accurate color reference. This ensures that virtually staged furniture and decor integrate seamlessly and realistically into the space.
Why It Works
Accurate white balance directly impacts a buyer's emotional and logical assessment of a property. True-to-life colors allow potential buyers to correctly visualize the space with their own belongings and understand the quality of materials like cabinetry, flooring, and paint. When a buyer visits a home and finds the colors match the online photos, it builds trust and reinforces their interest. Conversely, a property that looks completely different in person can feel deceptive, instantly souring the viewing experience.
Actionable White Balance Techniques
Follow these practical steps to achieve perfect color in your images:
- Shoot in RAW Format: Always shoot in RAW. This file format captures the most color information from the camera's sensor, giving you maximum flexibility to adjust white balance in post-processing without losing image quality.
- Use a Gray Card: For ultimate accuracy, use an 18% gray card. Take a reference shot with the card in the scene under the primary light source. You can use this photo to set a custom white balance in-camera or as a perfect reference point in software like Lightroom.
- Avoid Auto White Balance (AWB): While convenient, AWB can be inconsistent, especially in rooms with mixed lighting (e.g., daylight from a window and warm tungsten lamps). Manually set your white balance using presets (like Daylight or Tungsten) or dial in a specific Kelvin temperature for consistent results across all photos of the same room.
- Batch Correct for Consistency: In post-processing, correct the white balance on one reference image from a room, then synchronize that setting across all other photos taken in the same lighting conditions. This ensures the entire virtual tour feels cohesive.
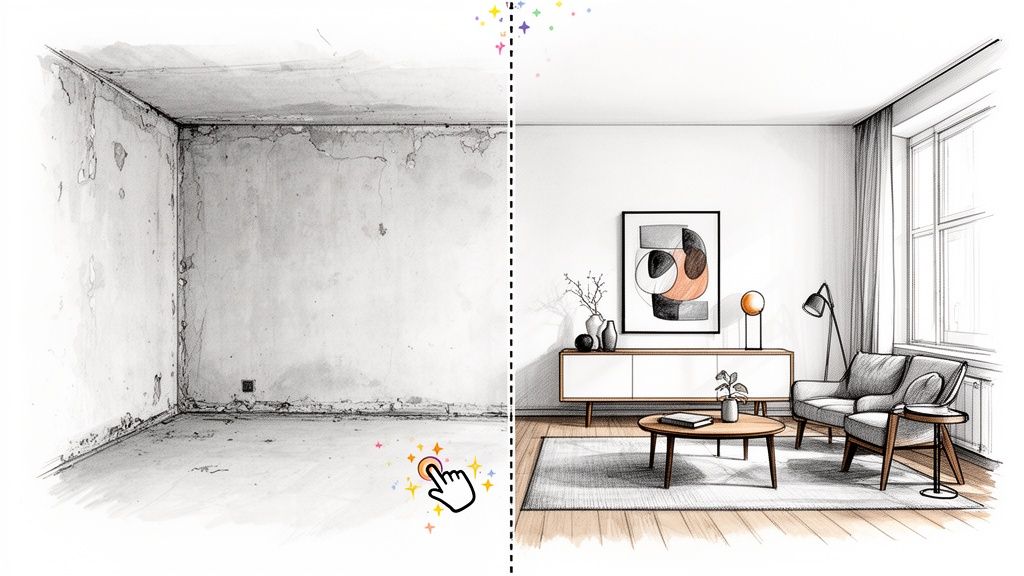
6. Leverage Virtual Staging and AI Visualization for Design Iterations
An empty room can be a blank canvas, but for many buyers, it's an intimidating void. Virtual staging and AI visualization tools bridge this gap by digitally furnishing empty spaces, allowing potential buyers to see a property's true potential without the cost and logistics of physical staging. Platforms like MoldaSpace use AI to transform a single photo of a vacant room into multiple, fully-furnished, photorealistic design concepts in seconds. This is one of the most innovative real estate photography tips because it maximizes a property's appeal and accelerates the sales cycle.
This technology empowers agents, stagers, and designers to showcase a property in various styles, from Japandi and Scandinavian to Industrial or Minimalist. It's not just about adding furniture; it's about selling a lifestyle and helping buyers envision themselves living in the space.
Why It Works
Virtual staging directly addresses buyer uncertainty. Instead of guessing how their furniture will fit or what a room could look like, buyers are presented with compelling, move-in-ready visuals. This emotional connection is powerful. It allows marketers to cater to diverse tastes by presenting multiple design options, dramatically increasing the property's perceived value and appeal. Real estate agents using AI-powered tools can virtually stage dozens of properties weekly, a scale unattainable with traditional methods.
Actionable Virtual Staging Techniques
Follow these practical steps to integrate AI visualization into your workflow:
- Start with Quality Photos: AI tools produce the best results with high-quality, well-lit, and wide-angle images. A clean, balanced photo is the ideal foundation.
- Showcase Multiple Styles: Generate 3-5 different design variations for key rooms like the living room and primary bedroom. This shows the property's flexibility and appeals to a broader audience.
- Use Natural Language Prompts: Fine-tune the results by using descriptive prompts. Specify materials ("light oak flooring"), furniture styles ("boucle accent chair"), or color palettes ("warm neutral tones") to guide the AI.
- Create Before-and-Afters: Use your original, empty-room photos alongside the virtually staged renderings in marketing materials. This clearly demonstrates the transformative potential of the space. To explore this topic further, you can read more about what is virtual staging and its impact on modern marketing.
7. Master Depth of Field and Focus Techniques
Depth of field (DOF) is a powerful tool that dictates how much of your scene is in sharp focus. Unlike portrait photography where a shallow DOF blurs the background, real estate photography demands the opposite. The goal is to present a room with clarity from the foreground to the background, allowing potential buyers to see every detail clearly. This is one of the most essential real estate photography tips because a sharp, fully focused image conveys quality, transparency, and professionalism.
When every part of the image is sharp, it gives a comprehensive view of the space, which is critical for online listings. This level of detail is also invaluable when providing images to AI-powered services like MoldaSpace, as sharp source photos enable the software to produce more accurate and believable virtual staging results.
Why It Works
A deep depth of field makes a space feel explorable and honest. When a potential buyer can zoom in and see the texture of the hardwood floors, the details of the kitchen backsplash, and the view from the window all in one shot, it builds trust and confidence. A blurry background can obscure features or make a room feel smaller than it is. By keeping everything in focus, you are providing a complete and accurate representation of the property, which helps buyers visualize themselves in the home and appreciate its features.
Actionable Focus Techniques
Follow these practical steps to achieve maximum sharpness:
- Use the Right Aperture: Set your camera's aperture between f/8 and f/11. This range is the sweet spot for most wide-angle lenses, providing extensive depth of field without introducing lens diffraction, which can soften the image.
- Focus One-Third Into the Scene: For optimal sharpness throughout the frame, manually focus on a point roughly one-third of the way into the room. This technique leverages how depth of field works, distributing the plane of focus effectively.
- Use a Tripod: A smaller aperture like f/11 requires a slower shutter speed to let in enough light. A sturdy tripod is non-negotiable to prevent camera shake and ensure your images are tack-sharp.
- Consider Focus Stacking: For rooms with extreme depth or critical architectural shots, take multiple photos focused at different points (foreground, middle, background) and merge them in post-production. This guarantees perfect sharpness from front to back.
- Review Before You Leave: Use your camera's LCD screen to zoom in and check the focus on critical areas. It's much easier to reshoot on-site than to fix a soft image later.
8. Utilize Drone Photography and Aerial Perspectives
Drone photography has revolutionized real estate marketing by offering breathtaking aerial views that ground-level shots simply cannot capture. It provides a unique perspective on a property's size, layout, relationship to its surroundings, and key features like pools, extensive gardens, or waterfront access. This elevated viewpoint tells a compelling story about the property's context and scale, instantly elevating its perceived value. Incorporating aerials is one of the most impactful real estate photography tips for showcasing large estates or properties with significant land.
These high-angle shots are also invaluable assets for modern marketing workflows. When a property has complex landscaping or outdoor potential, an aerial photo can serve as a perfect base image for an AI landscape design tool to visualize future possibilities, such as adding a new patio or garden layout.
Why It Works
An aerial perspective provides crucial information that buyers can't get from the street. It answers questions about the property's privacy, proximity to neighbors, the condition of the roof, and the overall flow of the outdoor space. For luxury listings, waterfront homes, or large-acreage properties, this context is not just a bonus; it's essential. Drone footage creates a dramatic, cinematic feel that captures attention and helps a listing stand out in a crowded market. It conveys a sense of grandeur and completeness that builds buyer confidence and excitement.
Actionable Drone Photography Techniques
Follow these professional steps for stunning aerial imagery:
- Get Certified and Insured: Before flying commercially, obtain your FAA Part 107 certification and carry liability insurance. This is a non-negotiable step for professional and legal operation.
- Shoot During the Golden Hour: Just like with ground photography, the soft, warm light of early morning or late evening makes aerial shots glow. It minimizes harsh shadows and highlights the property's best features beautifully.
- Vary Your Shots and Angles: Don't just take one high-altitude photo. Capture multiple perspectives: a direct top-down view (nadir), a low-angle approach highlighting the facade, and wide orbital shots that show the entire neighborhood context.
- Incorporate Video: Capture smooth, cinematic video sequences like reveals, fly-overs, and pans. Short video clips are incredibly powerful for social media, property websites, and virtual tours.
- Check Local Regulations: Always be aware of and comply with local airspace restrictions, including no-fly zones around airports, government buildings, and other sensitive areas.
9. Create Detailed Before-and-After Comparisons
Before-and-after comparisons are a storytelling tool that visually demonstrates a property's potential. By showcasing an original space next to a staged, renovated, or virtually redesigned version, you bridge the imagination gap for buyers. This technique is incredibly effective for vacant homes, properties needing updates, or new constructions, allowing potential owners to see what's possible rather than just what is. This is one of the most persuasive real estate photography tips because it transforms a property's perceived flaws into opportunities for value creation.
This method is dramatically enhanced by AI visualization tools. For instance, you can take a photo of an empty or dated room and use a service like MoldaSpace to generate a photorealistic "after" image in various design styles. This provides powerful marketing assets without the cost and logistics of physical staging.
Why It Works
Buyers often struggle to envision how an empty or outdated space can become their dream home. Before-and-after shots remove the guesswork. They highlight the impact of design, staging, or renovation, justifying the property's price and showcasing its hidden potential. This narrative of transformation is compelling and helps buyers form an emotional connection, seeing themselves not just in the house as it is, but as it could be. This visual proof is far more impactful than a simple verbal suggestion.
Actionable Before-and-After Techniques
Follow these practical steps to create compelling comparisons:
- Maintain Identical Angles: When shooting the "before" photo, lock down your tripod. The "after" shot must be taken from the exact same position, height, and angle for a seamless comparison.
- Use Consistent Lighting: Ensure lighting and white balance are the same in both shots. This consistency makes the changes in staging or renovation the true focus.
- Leverage Virtual Staging: For vacant properties, photograph the empty room and then use an AI tool to generate furnished "after" versions. This is a cost-effective way to show multiple style possibilities.
- Create Animated Transitions: Use simple video editing software to create a GIF or short video that fades or slides between the before and after images. This dynamic content is highly engaging on social media and property websites.
10. Optimize Photos for Digital Marketing and Multiple Platforms
Your work isn’t finished once the photos are edited. Professional real estate photography must be strategically optimized for the various digital platforms where it will be displayed. MLS listings, agent websites, social media feeds, and email campaigns all have unique requirements for aspect ratio, file size, and resolution. Proper optimization ensures your images load quickly and look stunning on any device, from a desktop monitor to a smartphone screen. This is one of the most critical real estate photography tips for modern marketing because it directly impacts user experience and lead generation.
Failing to optimize means a potential buyer might see a distorted image on Zillow or a slow-loading photo on Instagram, diminishing the impact of your hard work. Thoughtful optimization ensures every visual asset performs at its peak, regardless of the channel.
Why It Works
First impressions are digital. A potential buyer's initial interaction with a property is almost always online, and a poorly displayed photo can kill interest instantly. Optimizing images for each platform prevents awkward cropping that might cut out key features and ensures fast page load times, which is a major factor for both user retention and SEO ranking. By delivering a seamless visual experience across all touchpoints, you build credibility and keep potential buyers engaged with the listing.
Actionable Optimization Techniques
Follow these steps to prepare your photos for a multi-platform marketing strategy:
- Create Multiple Aspect Ratios: From a single high-resolution image, export versions for every key platform: a 4:3 ratio for MLS, 16:9 for website banners, 1:1 for Instagram grid posts, and 9:16 for Instagram Stories and Reels.
- Compress for the Web: Keep web-bound images under 2-3MB to ensure your website and listing pages load quickly. Use tools in Photoshop or Lightroom to export for the web, balancing quality with file size.
- Batch Process Efficiently: Use software like Adobe Lightroom or Capture One to apply export settings to entire photo sets at once. This saves hours of manual work and ensures consistency across all images.
- Add SEO-Friendly Metadata: Fill in the metadata for your images with descriptive alt text and keywords, such as the property address and key features. This helps search engines understand and rank your listing photos.
- Leverage AI for Variations: When using tools like virtual staging, you can often generate platform-specific outputs. For example, you can learn more about how AI for real estate marketing helps create optimized assets for different channels, saving you even more time.
10-Point Real Estate Photography Tips Comparison
| Technique | Implementation Complexity 🔄 | Resource Requirements ⚡ | Expected Outcomes 📊 | Ideal Use Cases 💡 | Key Advantages ⭐ |
|---|---|---|---|---|---|
| Master Lighting for Maximum Visual Impact | Medium — planning (golden hour) + lighting setup | Reflectors, flashes/continuous lights, timing, possible rental | Warm, shadow-controlled images; higher perceived value | Luxury interiors, hotel shots, reference images for AI | Emotionally engaging visuals; less heavy post-processing |
| Use Wide-Angle Lenses to Maximize Space Perception | Low–Medium — composition + distortion control | 16–35mm lens (full frame), tripod optional, post lens correction | Rooms read larger; captures more context in one frame | Small rooms, MLS listings, interior portfolios | Maximizes space perception; reduces shot count |
| Stage and Declutter Properties Before Shooting | Medium — time and staging decisions; may need pros | Labor, staging furniture or virtual staging tools, cleaning | Higher perceived value; faster market time; improved appeal | Vacant homes, listings targeting broad buyer pool | Helps buyers visualize; significantly improves marketing |
| Capture Multiple Angles and Perspectives Per Room | Medium — more shooting time and composition care | Time, storage, organized workflow, tripod | Comprehensive property coverage; better engagement & tours | Virtual tours, high-end listings, AI inputs | Thorough spatial understanding; richer content for listings |
| Perfect White Balance and Color Accuracy | Medium — technical color management | Gray card/color targets, RAW files, calibrated monitor | Consistent, true-to-life colors; builds trust | Design-focused listings, material/finish highlights | Accurate color rendering; reduces corrective post work |
| Leverage Virtual Staging and AI Visualization for Design Iterations | Low–Medium — learning tool prompts and workflows | High-quality reference photos, credits/software access | Rapid multiple design variations; faster time-to-market | Vacant listings, client presentations, design exploration | Fast, cost-effective staging; multiple style options |
| Master Depth of Field and Focus Techniques | Medium — technical aperture and focus control | Tripod, knowledge of hyperfocal distance, focus-stacking tools | Sharp room-wide images; clear detail rendering | Architectural shoots, detail-oriented listings | Ensures full-room sharpness; professional detail clarity |
| Utilize Drone Photography and Aerial Perspectives | High — certification, regulations, piloting skill | Drone, FAA Part 107 (or local), insurance, favorable weather | Unique aerial context; stronger listing engagement | Large estates, waterfront, properties where lot/context matters | Shows lot layout and surroundings; memorable marketing |
| Create Detailed Before-and-After Comparisons | Medium — matched shooting + post production | Consistent camera positions, staging/renovation time, editing | Clear transformation storytelling; demonstrates ROI | Renovations, design pitches, vacant-to-staged showcases | Powerful visual proof of value; compelling marketing asset |
| Optimize Photos for Digital Marketing and Multiple Platforms | Medium — platform specs + batch processing | Editing/export software, presets, time for versioning | Faster page loads, consistent presentation, higher CTR | Multi-channel campaigns, MLS + social + email marketing | Platform-ready assets; improved SEO and user experience |
Beyond the Lens: Integrating Technology for a Competitive Edge
Mastering the art and science of real estate photography is a journey of continuous learning. We've navigated the essential pillars, from the foundational importance of lighting and composition to the strategic use of wide-angle lenses and the meticulous process of staging. By now, it’s clear that a compelling property image is far more than a simple point-and-shoot snapshot. It’s a carefully crafted narrative designed to evoke emotion, highlight potential, and drive a viewer to take the next step.
The collection of real estate photography tips detailed in this guide provides a robust framework for excellence. You’ve learned how to harness natural and artificial light to create bright, inviting spaces, and how to select the right angles to make every room feel spacious and welcoming. You understand the critical need for perfect white balance to ensure colors are true-to-life, and the power of depth of field to guide the viewer’s eye. These are the non-negotiable skills that separate amateur efforts from professional, high-impact results.
Synthesizing Skill and Strategy
The true takeaway is that technical proficiency and strategic marketing must work in tandem. Capturing stunning images is only half the battle. The other half lies in knowing how to leverage those assets effectively.
- For Real Estate Agents: Your photographs are your primary marketing tool. High-quality images not only attract more buyers but also build your personal brand as a detail-oriented, professional agent who invests in quality.
- For Architects and Designers: Your portfolio is your resume. Crisp, well-composed photos that accurately represent your design intent are crucial for attracting discerning clients and winning prestigious projects.
- For Home Stagers: Your work is brought to life through the lens. Before-and-after shots provide undeniable proof of your value, showcasing the transformative power of effective staging.
This is why mastering concepts like drone photography for unique perspectives and optimizing images for various digital platforms is no longer optional. It's a core component of a modern marketing strategy that ensures your hard work reaches and resonates with the right audience.
The Next Frontier: From Static Images to Dynamic Visualization
While traditional photography captures what is, the future of property marketing lies in showcasing what could be. This is where the integration of advanced technology becomes a game-changer. The ability to complement your pristine photographs with AI-powered virtual staging and design visualization elevates your service offering from simply documenting a space to helping clients envision its full potential.
Think beyond the empty room. By combining your exceptional photography skills with tools like virtual staging, you can present a single space in multiple styles. One photograph can become the canvas for a minimalist, modern, or classic design, appealing to a much broader range of tastes without the logistical and financial burden of physical staging. This hybrid approach, merging proven real estate photography tips with cutting-edge technology, is the key to creating a truly competitive edge in a crowded market.
Your next step is to move from theory to practice. Don't just read these tips; implement them. Experiment with bracketing and HDR. Refine your post-processing workflow. Challenge yourself to find new and creative angles. By consistently applying these principles and embracing the technological tools that augment your craft, you will not only create breathtaking images but also deliver unparalleled value to your clients, turning every property into an irresistible opportunity.
Ready to bridge the gap between stunning photography and powerful design visualization? Elevate your marketing assets by integrating AI-powered virtual staging with MoldaSpace. Transform your empty property photos into fully furnished, aspirational homes in minutes and show clients the true potential of any space. Explore the possibilities at MoldaSpace and redefine what your images can achieve.